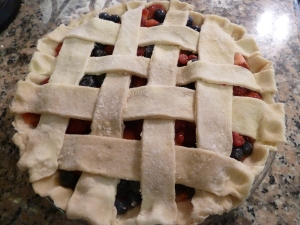
I’ve finally overcome my fear of making pie crust! It all started a few years ago when a friend asked me to make pies for her wedding reception. She and her then fiance aren’t into cake, so they opted to have friends make different types of pies instead, which sounds cool and trendy except if you are one of the people responsible for making pies worthy to be served at someone’s wedding. Given the occasion, it seemed like making a homemade crust was a good idea. However, back in those fresh out of college days I didn’t own a food processor, pastry blender (I don’t think I even knew what that was at the time), or a even a rolling pin. Needless to say, things didn’t go so well. I ended up with a big, sticky, blob of floury mess that I wanted to throw at a wall. So, I went to Trader Joe’s and bought a crust instead — while trying to convince myself that no one would be able to notice. (FYI: After making my own crust, I have to admit that YES you can totally tell the difference between homemade and store-bought crust.) So far, my friend’s marriage doesn’t appear to have been cursed by my store-bought crust…
A couple of days ago, I decided to make a berry pie to bring for dinner at a friend’s house and thought it might be time to confront my crust-making fears. I mean, in theory, it shouldn’t be all that hard, right? People have been making pie crusts for hundreds of years. So, I did some research and came across great recipes and tutorials for making pie crust on SmittenKitchen. One recipe she posted from Cooks Illustrated includes vodka (based on some science-y reasoon, they found that vodka created moist, easy-to-roll dough that stayed tender) — you know how those Cooks Illustrated folks are. Anyway, for my first time, I decided to stay away from the vodka and go with a more simple approach, which was Deb’s all-butter crust listed below. As promised, it was flakey, buttery, and left me wanting more.
If you’ve never made a pie crust before, I’d also recommend you check out Deb’s instructions for rolling out dough and making a lattice crust — super helpful.
Here are a few things I learned when making my first crust: 1) Don’t roll out the dough too much beyond the 12-inch circle, otherwise the crust will end up being too thin and you’ll have lots of leftover dough. 2) Don’t be afraid to add a little extra water if needed while making the dough to help it all stick together. 3) When rolling out the dough, the more flour the better. 4) If making a lattice top, more criss-crossing layers (i.e., cut the dough in thinner strips) are better than less. Even though it’s a little more work, it’s worth it to have more delicious crust on your pie.
Basic All Butter Pie Crust
Makes enough dough for one double-, or two single-crust pies.
INGREDIENTS
2 1/2 cups flour, plus extra for rolling
1 tablespoon sugar
1 teaspoon table salt
2 sticks (1 cup) unsalted butter (should be very cold)
DIRECTIONS
- Set aside about one cup of ice water. In a large bowl, whisk together flour, sugar, and salt. Cut two sticks of very cold butter into 1/2-inch cubes.
- Sprinkle the cubes of butter over the flour mixture and begin cutting them into the flour using a pastry blender (this step can also be done with a food processor). Continue working butter into the flour until well-combined and butter pieces are the size of tiny peas.
- Drizzle about 1/2 cup of the ice-cold water (minus the ice cubes) over the flour and butter mixture and use a rubber spatula to begin mixing it into the dough. As you mix in the water, start gathering the dough into a large clump. Continue adding water one tablespoon at a time (up to another 1/2 cup) to the dough as you gather damp clumps together to make one large ball of dough. Collect any remaining damp clumps and knead them gently into the large ball of dough.
- Divide the dough in half, and wrap each half in plastic wrap. Try to form the dough into a disk as you wrap it. Let the dough chill in the refrigerator for at least one hour before rolling it out. Dough can also be frozen at this point, but make sure it is well-covered in plastic wrap and stored in a freezer bag. NOTE: You can keep the dough the refrigerator for about a week and in the freezer for a few weeks. To defrost your dough, move it to the refrigerator one day before using it.
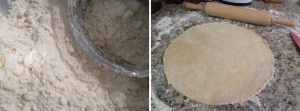
- When you are ready to roll out the dough, remove it from the refrigerator and place on a smooth, floured surface (I started with about 1/4 cup of flour covering my surface). Let it sit for a few minutes to make it easier to roll. Sprinkle some flour on top of the dough and use a rolling pin to roll out the dough creating a 12-inch circle. Continue sprinkling flour under the dough and on top as you are rolling it out to prevent it from sticking. After the dough is rolled out, cut it into a 12-inch circle using a sharp knife. (I used a bowl with a 12-inch diameter as a guide when cutting, but a ruler will also work to make sure your crust is big enough.) Transfer the dough to a 9-inch pie plate, and press down to line the pie dish. Trim any dough hanging over the edge of the pie plate and crimp edges.
Adapted from SmittenKitchen


One Response to “Basic All Butter Pie Crust”